
In the Summertime we tend to engage in much more outdoor play than craft creation but in the evenings I do sometimes manage to put together a few small projects. This week Naiya and I were noticing the bees and spiders flourishing in the gardens and farms and while laying on our backs in the playroom one afternoon, we talked about bees coming to harvest nectar from the wreath of flowers hanging around the ceiling silks. While she was sleeping one night I assembled seven buzzing little critters while listening to my favorite hot weather tunes. They took about ten minutes each and are a great first time project for those who have yet to try a hand at needle felting.
For these very simple bugs one will need some small tufts of black, yellow and white wool, a felting needle and felting pad. (All of which can probably be purchased from your local craft store.)


Begin by tying a three to four inch length of the yellow wool into a knot and then wrapping the excess around that knot to form an elongated ball.
Using the felting needle, poke at the ball until the loose bits of wool are held into place.
Take some small wisps of black wool and roll them into a thin strands with the heels of your hands to create two three to four inch lengths for the stripes of the bee.

Wrap these stripes around your yellow bee ball and needle them into place. (It's best to do this with the project on the felting pad to avoid poking yourself with the very sharp, barbed needle.)


Roll another fluff of black wool with the heels of your hands into a small ball to create the "face" of the bee.
Needle that ball until flattened onto one end of the bee.

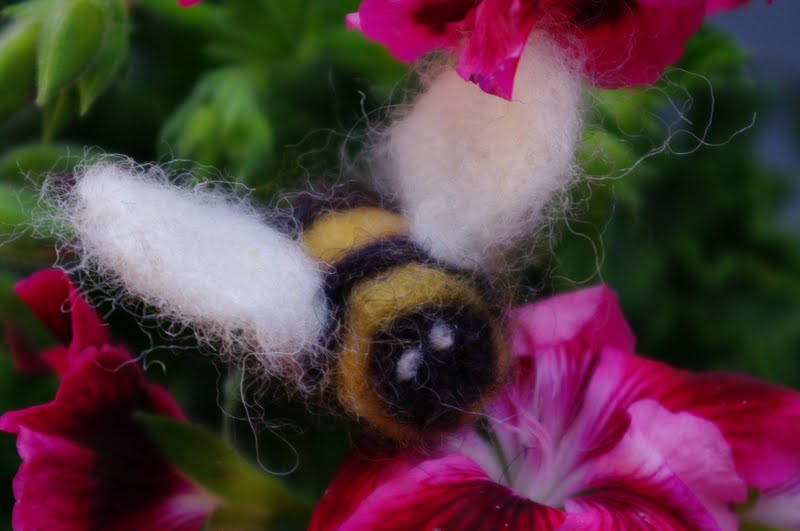
Take a thick quarter sized bit of white wool and again rub it into its basic wing shape using the warm heels of your hands before then placing it onto the felting pad.
On the pad, needle the wings until that they become somewhat flat. The wool will be stuck to the pad a bit. Gently pry it up, turn it over and needle the other side.

The wings will be a bit fuzzy having been stuck to the pad. This adds to the soft and dreamy nature of all things felted I think and is perfectly alright.
Being careful not to poke yourself, needle the wings onto the bee. (I did this from underneath and sort of sculpted the angle so that the front end of the wings were slightly closer together than the back.)

To make the little critters more personable I also needled on tiny eyes.

I hung them from threads and the swarm took off around the flowers hanging in the playroom from the ceiling silks.
I think they'd also be a great edition to a Summer Nature Table...
I love them. Thanks for the idea!
ReplyDeleteBeautiful!!!
ReplyDeleteI love them! They are so adorable. Thanks for the tutorial!
ReplyDeleteBecca
Beautiful little bees!
ReplyDeleteI made a couple of bees tonight and added antennae with the beading thread I used to sew on the bead eyes. Using the thread doubled, I sewed the antennae thread through the head above the eyes and knotted each end. Then I painted clear nail polish on each antenna to make the thread stiff. I think they add charm to the bees. Thanks for the tutorial.
ReplyDeleteI made a couple of bees tonight and added antennae with the beading thread I used to attach the bead eyes. Then I painted each antenna with clear nail polish to make them stiff. Thanks for the tutorial. The bees are really cute.
ReplyDeleteYou're welcome. I'm glad you were able to make a few. The antennae sound like a great addition. Come next summer I'll have to add those! (This year's bees were mostly thrashed by a couple of ravaging kittens.)
DeleteI am going to make a bee and stick it on the end of heavy florist wire, making a plate poke. Thanks for the instructions!
ReplyDeleteI have not made anything yet. It kind of scares me to start. I would like to know what kind of pad you used since I do not have one.
ReplyDeleteI use a special foam pad purchased specifically for felting but one could use something on hand like a thick sponge as well. Anything that won't bend the needle will do.
ReplyDelete